How-To Guide
Everything you need, step by step.
Choose your role for illustrated directions on every feature of G.R.I.T. Academy and the Teacher Hub.
For teachers & professors
Teachers & Professors
Set up a class, bring in your students, and follow their progress. Works the same for K–12 teachers and college professors.
-
1
Get access
Go to /teacher-hub/ and log in. New? Create a free account, then fill in Request Teacher Hub access — or your school or district administrator can invite you by email. You’ll get an email to set your password.
-
2
Create a class
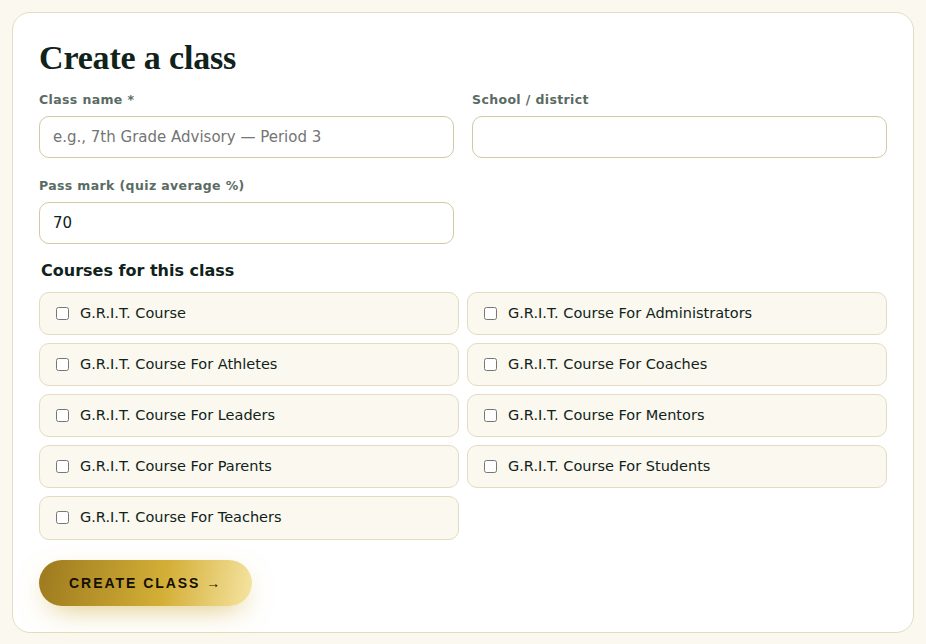
Click + New class. Name it (e.g., “7th Grade Advisory – Period 3” or “EDU 2000 – Section 04”), add your school, set the pass mark (the quiz average that counts as passing — 70% by default), tick the G.R.I.T. courses for this class, and click Create Class.
-
3
Add your students
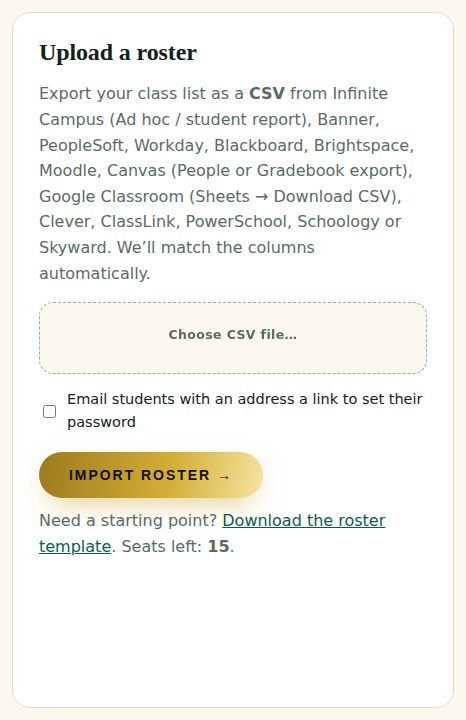
Open Roster & Import. Export your class list as a CSV from Infinite Campus, Google Classroom, Canvas, Clever, ClassLink, PowerSchool, Schoology, Skyward — or Banner, PeopleSoft, Workday, Blackboard, Brightspace or Moodle — and upload it. Columns are matched automatically. Tick Email students a link to set their password if your roster has emails. Students without an email get a username and password on the login cards you download right after the import (available for 30 minutes — keep them private).
-
4
Or share your class code
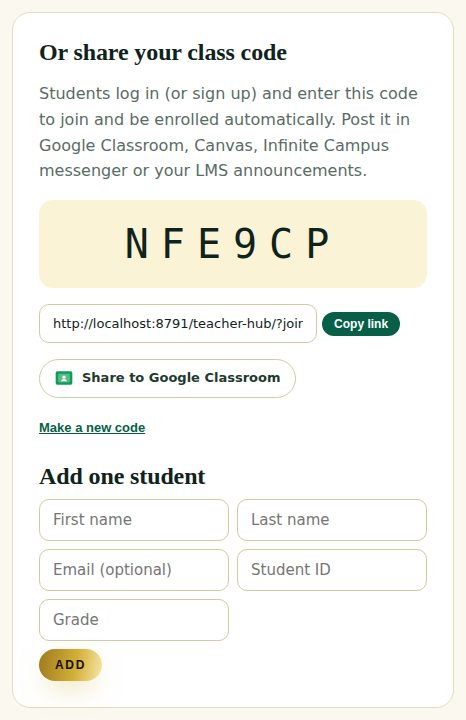
Every class has a 6-letter code and a join link. Click Share to Google Classroom to post it as an announcement, or paste the link into Canvas, Infinite Campus Messenger or your LMS. Students log in, click the link, and they’re enrolled.
-
5
Check progress
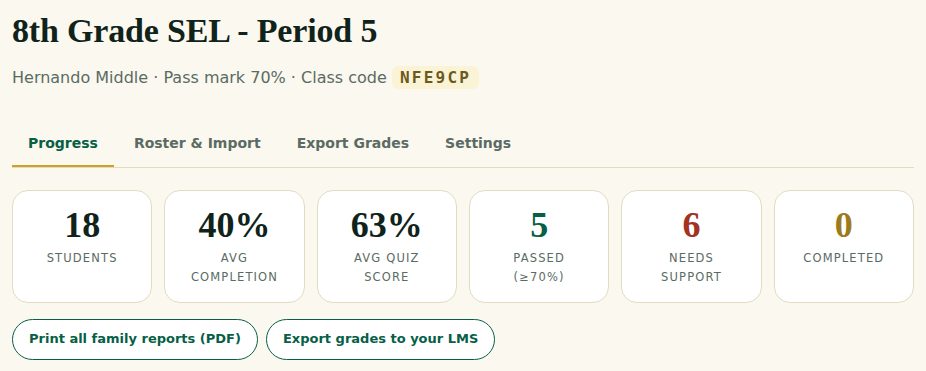
The Progress tab shows students, average completion, average quiz score, how many passed, who needs support and who hasn’t started — plus this week’s G.R.I.T. move for your class. Use the filters (Needs support, Not started…) to focus.
-
6
Read the charts
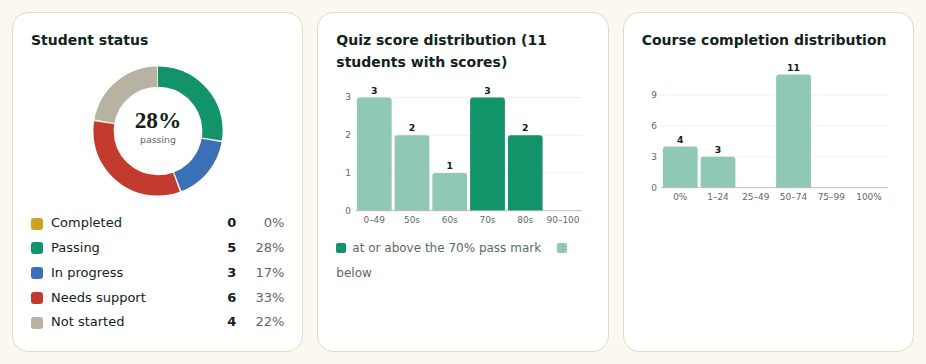
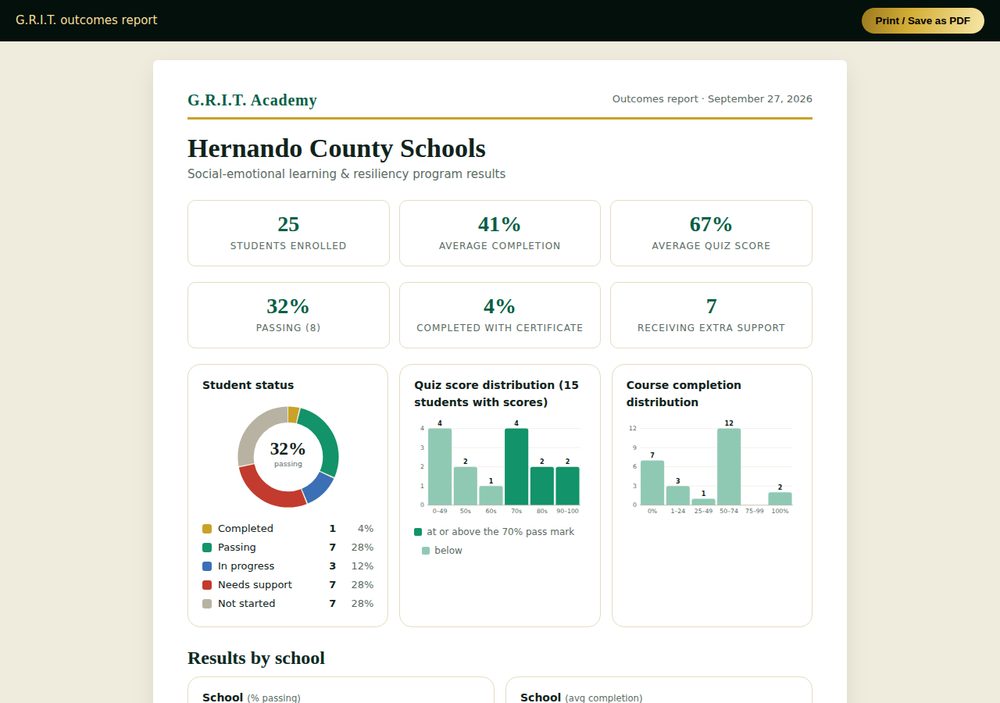
The pie chart shows each student’s status; the histograms show how quiz scores and completion are spread out (dark green = at or above your pass mark). Under Disaggregate results by, pick Grade, Gender, ELL, ESE/IEP, 504, Economically disadvantaged or Race/ethnicity to compare groups. (Student-group charts appear when your roster includes those columns.)
-
7
Encourage each student
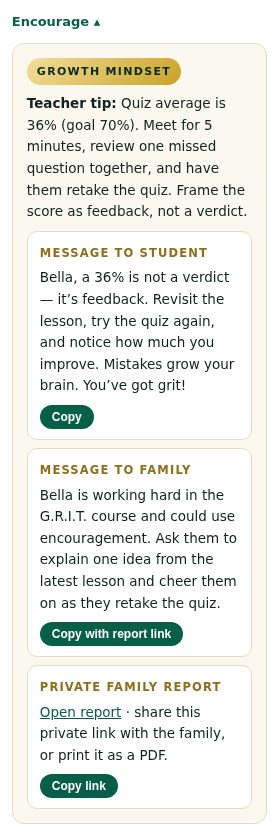
Click Encourage on any student for a G.R.I.T. tip for you, a message for the student and a message for the family — each with a Copy button. The family message can include a private link to the student’s progress report.
-
8
Share with families
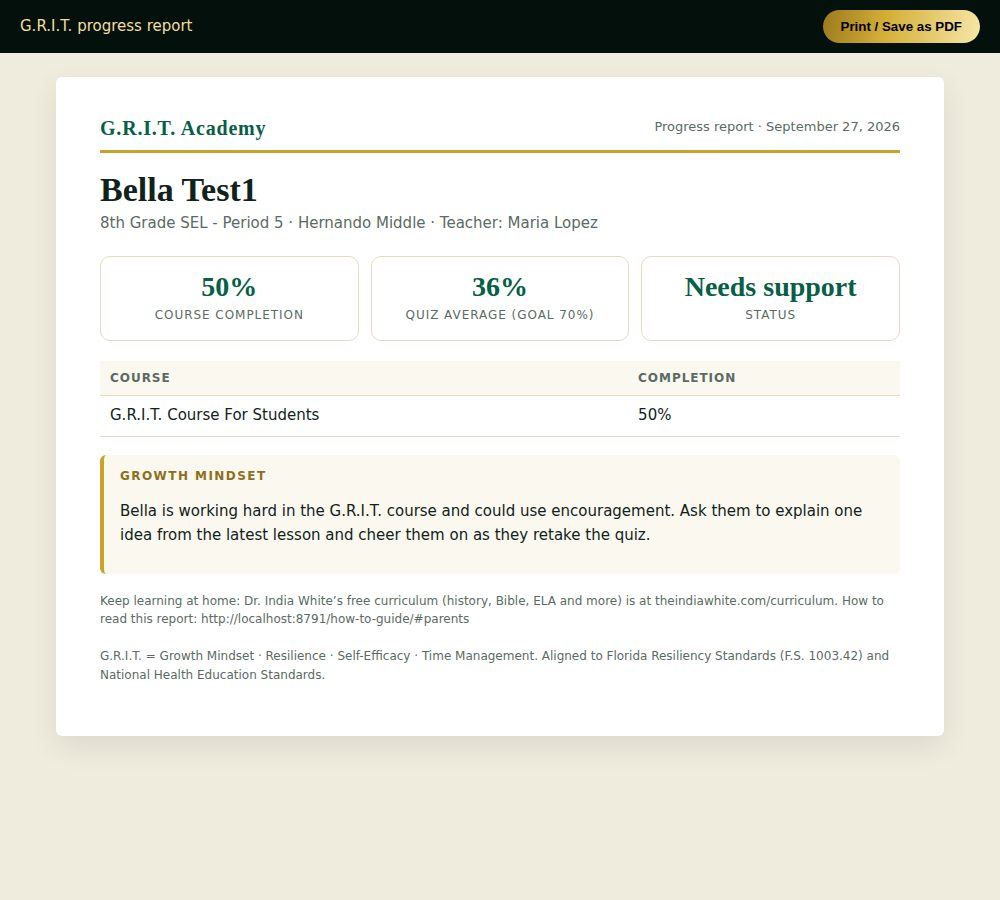
Each student has a private family report link (no login needed) showing completion, quiz average, status and a G.R.I.T. note for home. Click Print all family reports (PDF) on the Progress tab to print or save every report at once for conferences.
-
9
Send grades to your gradebook
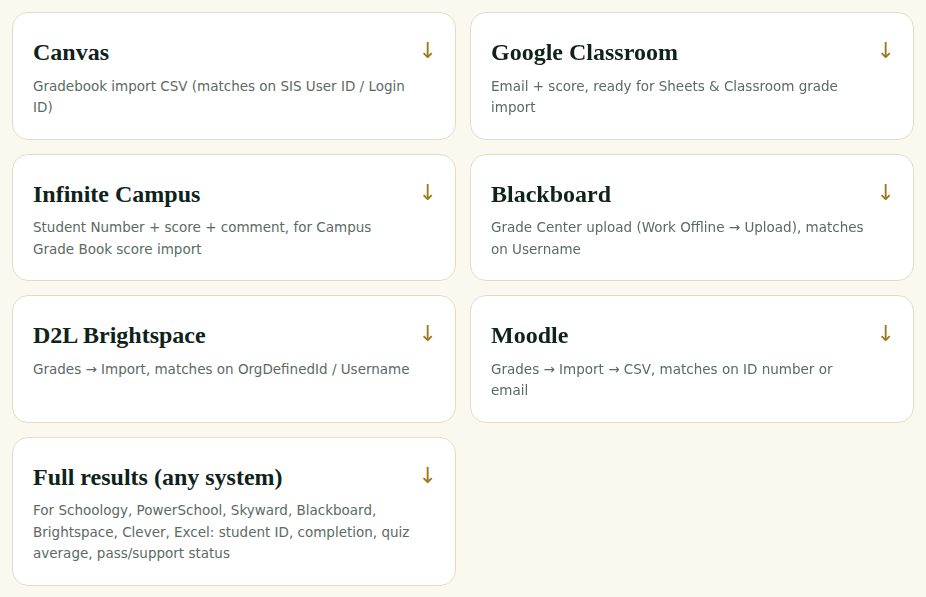
Open Export Grades and download the file for your system — Infinite Campus, Google Classroom, Canvas, Blackboard, Brightspace, Moodle, or the full results file for anything else. Each option lists the exact import steps. The G.R.I.T. Course Score (0–100) averages completion and quiz average.
For school & district leaders
School & District Leaders
Principals, district administrators, deans and program directors see every class they oversee, share out seats, and produce reports for boards and the state.
-
1
Your overview
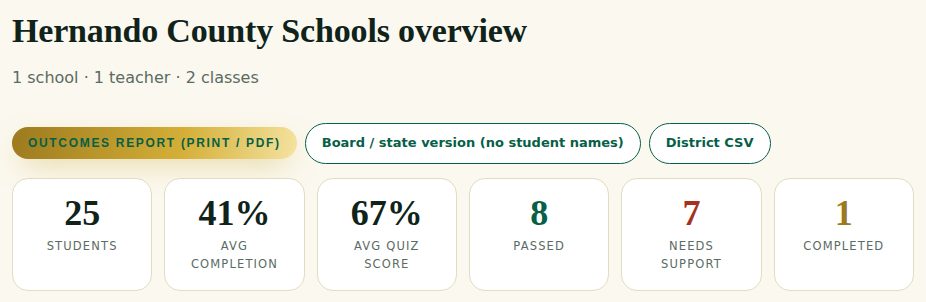
Log in at /teacher-hub/. You land on your School or District overview: total students, average completion and quiz scores, passed, needs support and completed — for every class in your school or district, grouped by school.
-
2
Compare schools and student groups
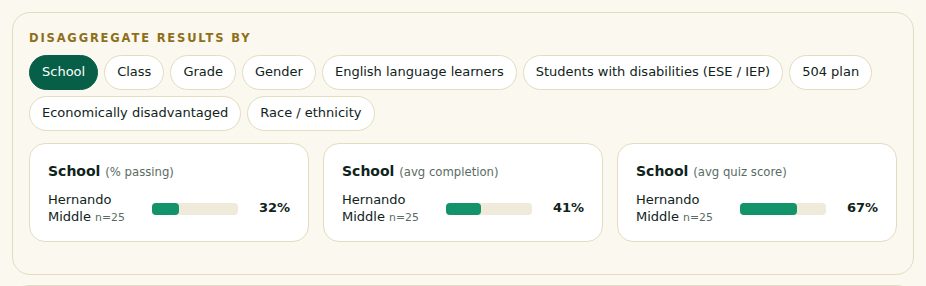
Use Disaggregate results by to compare schools, classes, grades and student groups side by side with bar charts, plus the status pie and score histograms.
-
3
Add teachers and share seats
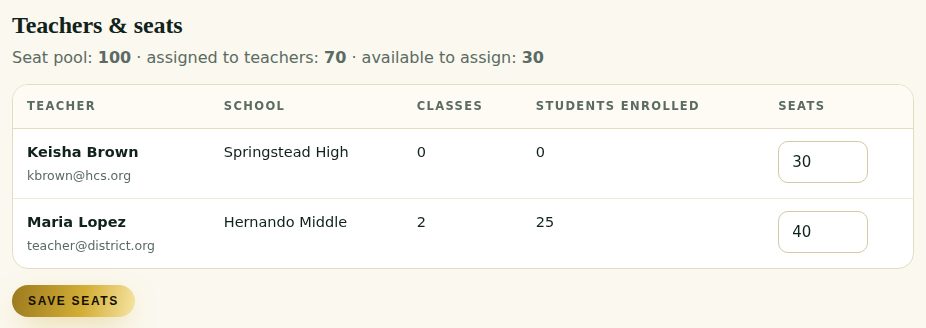
Under Teachers & seats, set how many students each teacher may enroll and click Save seats (you can’t assign more than your license pool). Use Add a teacher to invite a teacher — district administrators can also add school administrators. Each person gets an email to set their password.
-
4
Board, state & accreditation reports
Click Outcomes report (print / PDF) for a full report by school and class with charts, or Board / state version for aggregate data only — no student names, and any group under 5 students is hidden to protect privacy. District CSV gives the raw numbers for your data team.
-
5
Open any class
Click a class in the left menu to see its students, charts, encouragement tips, family reports and grade exports — exactly what the teacher sees.
For site administrator (dr. white)
Site Administrator (Dr. White)
You control access, licenses, prices and course packages from the WordPress dashboard.
-
1
The G.R.I.T. Toolkit
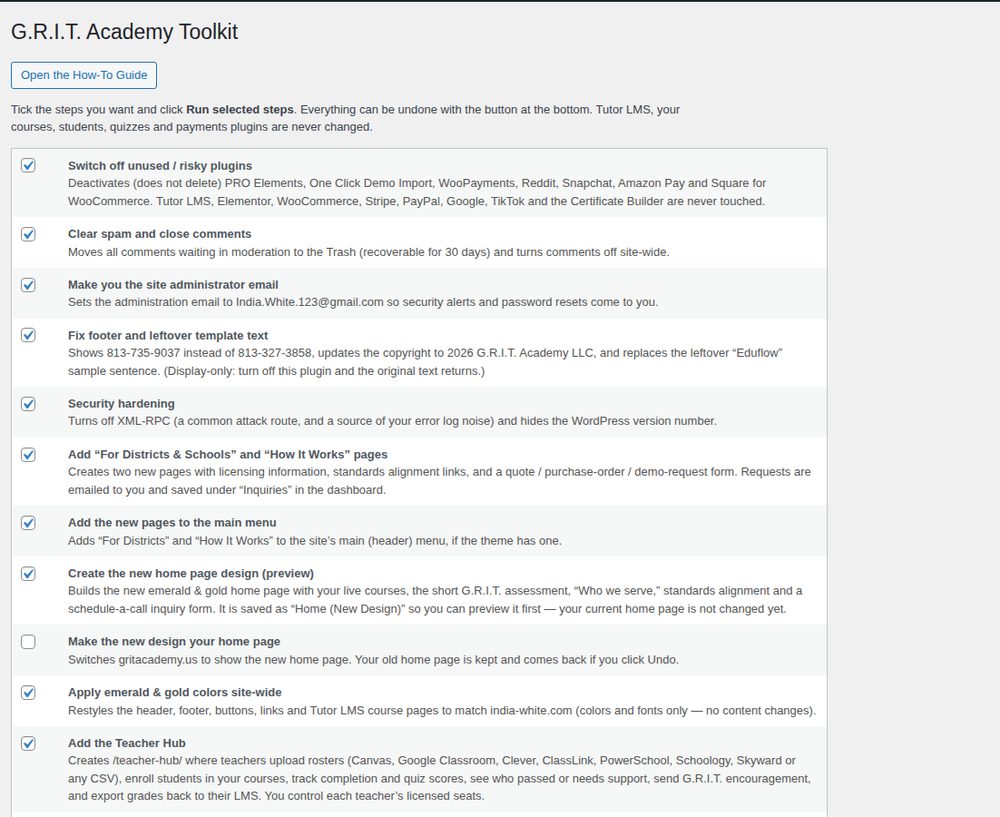
In WordPress go to Tools → G.R.I.T. Toolkit. Tick any steps you want and click Run selected steps. Undo all Toolkit changes at the bottom puts everything back.
-
2
Approve teachers & leaders
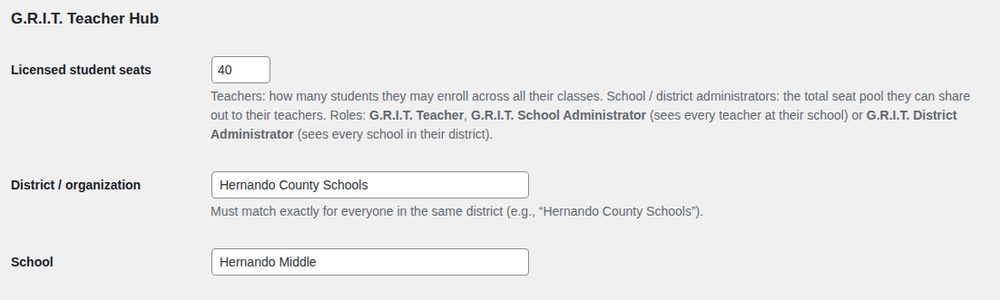
When someone requests access you get an email and an entry under Inquiries. Go to Users → edit the user, set Role to G.R.I.T. Teacher, G.R.I.T. School Administrator or G.R.I.T. District Administrator, then fill in Licensed student seats, District / organization and School and click Update User. For a district, give the District Administrator the district’s full seat pool — they share it out to their teachers.
-
3
Prices & payment links
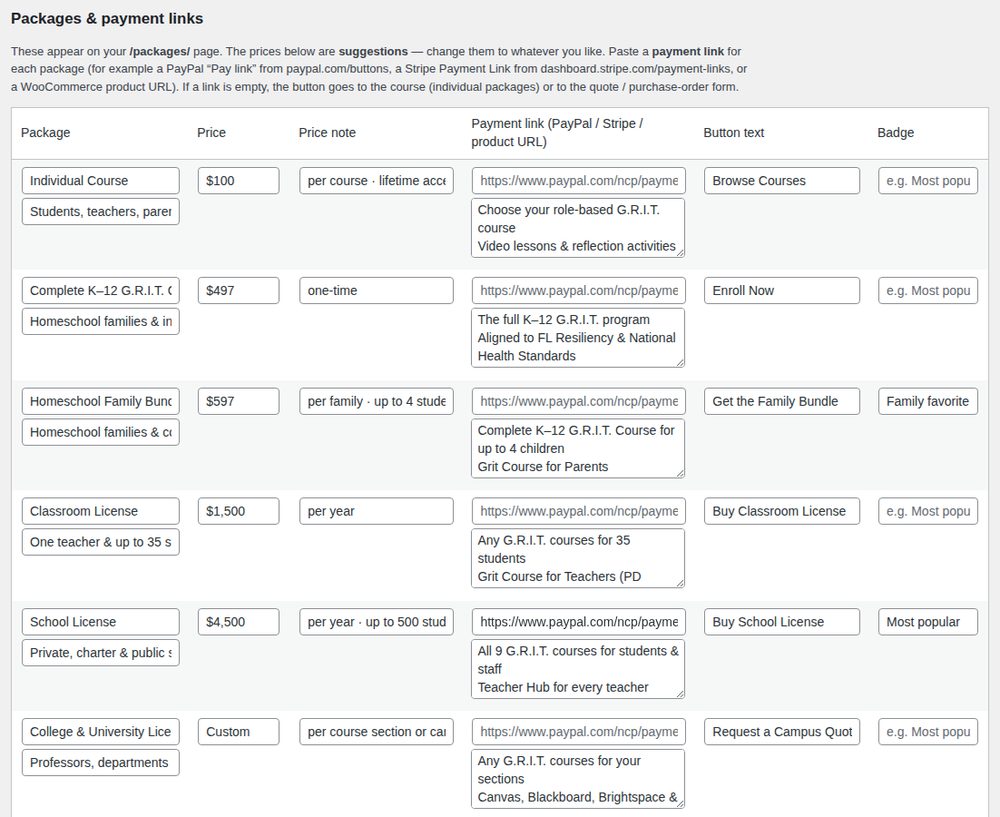
In the Toolkit, scroll to Packages & payment links. Change any price, wording or badge, and paste a PayPal Pay link, Stripe Payment Link or product URL for each package. Click Save packages. Empty links send buyers to the quote / purchase-order form.
-
4
Course packages for a district or university LMS
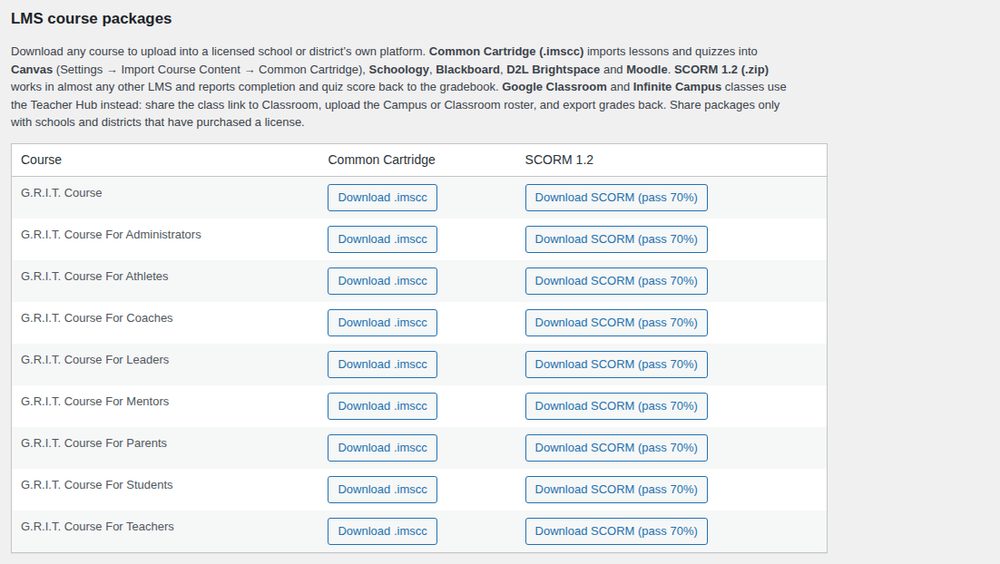
In the Toolkit, scroll to LMS course packages. For a licensed school, district or university, download the course as Common Cartridge (.imscc) for Canvas, Schoology, Blackboard, Brightspace or Moodle, or SCORM for other platforms, and email it to their LMS administrator. Share only with paying customers.
-
5
Research page, dissertation & articles
The Research & Data page (/research/) shows NAEP and NCES data, persistence research, your dissertation findings with a Get the book on Amazon button, and your published articles (AMS Notices, NCTM and FCTM Dimensions). In the Toolkit, scroll to Research page: dissertation & article links to type each article’s exact title, paste a better link (for example the direct FCTM link) or add a free UF Libraries link, then click Save links & titles.
-
6
Inquiries & leads
Every quote request, call request, assessment lead and access request is emailed to both of your addresses and saved under Inquiries in the dashboard, so nothing is lost if an email lands in spam.
For parents & families
Parents & Families
Follow your child’s progress and help them build grit at home.
-
1
Open your child’s report
Your child’s teacher can send you a private link. It opens a progress report — no login needed — with course completion, quiz average (and the class goal), status, and a G.R.I.T. note for home. Click Print / Save as PDF to keep a copy.
-
2
What the status means
Completed: finished with a passing quiz average. Passing: quiz average at or above the class goal. In progress: working through lessons. Needs support: quiz average below the goal — encourage a retake. Not started: help your child find 15 minutes for Lesson 1.
-
3
Help at home
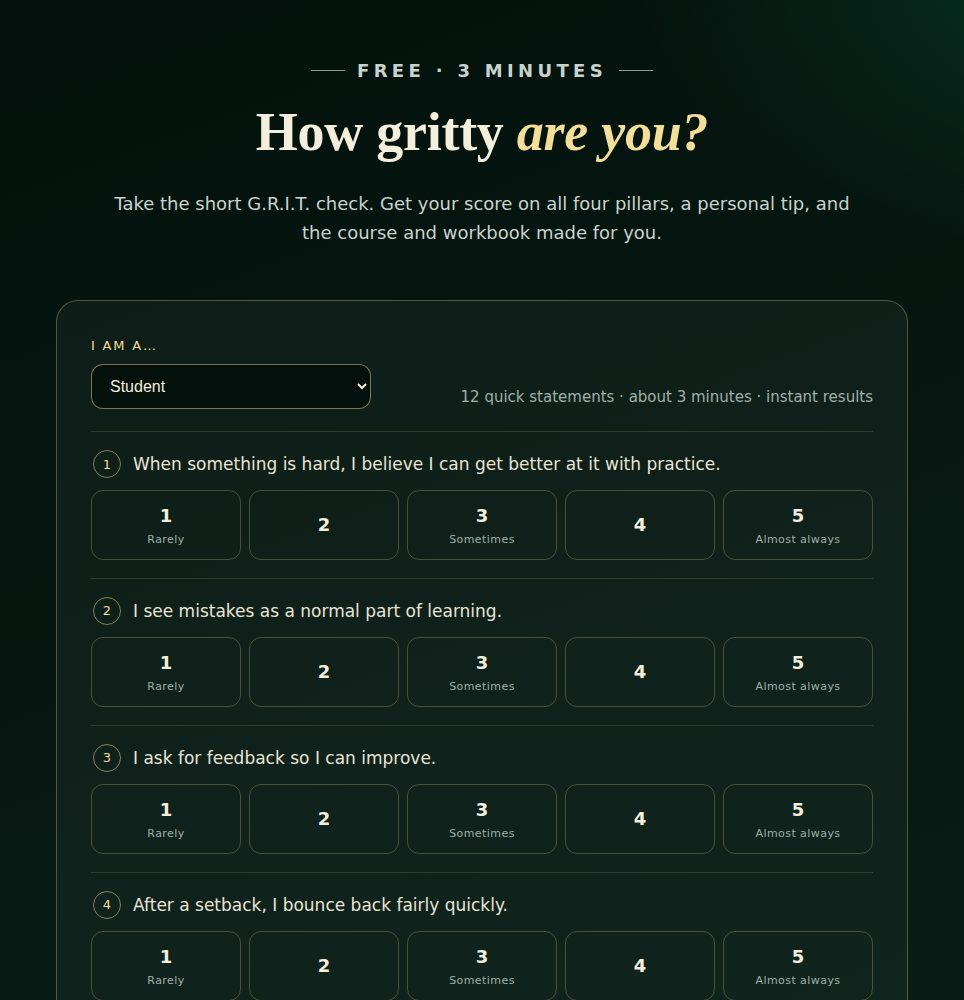
Ask your child to teach you one idea from their latest lesson, celebrate effort (not just scores), and use the word “yet” — “You can’t do it yet.” The free G.R.I.T. Check on the home page shows where your family can grow, and Dr. White’s free curriculum (history, Bible, ELA and more) is at theindiawhite.com/curriculum.
-
4
Questions?
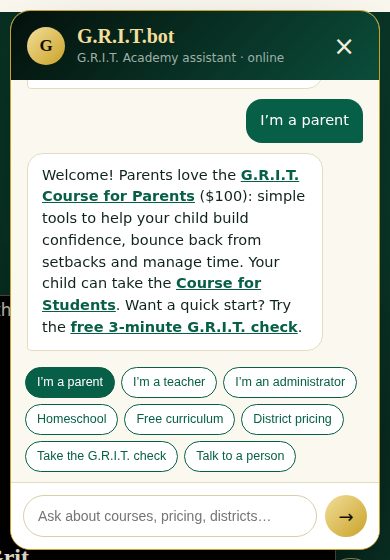
Tap Ask G.R.I.T.bot at the bottom right of any page, or use the language button at the bottom left to read the site in Spanish, Haitian Creole, Portuguese, Chinese and more.
For students
Students
Join your class and earn your certificate.
-
1
Join your class
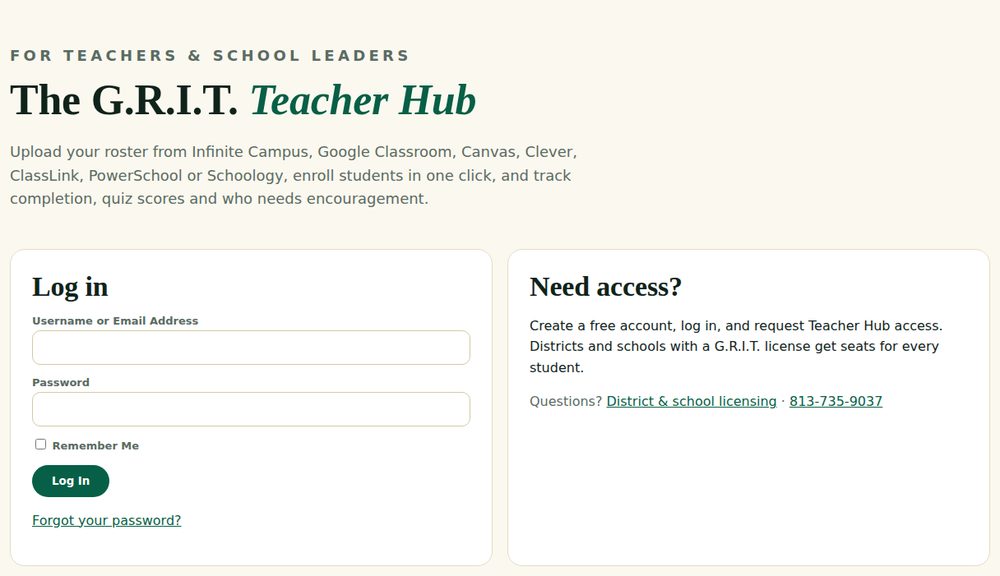
Click the link your teacher shared (or go to /teacher-hub/ and enter your class code). Log in — or create your free account — and you’re added to the class and your course automatically.
-
2
Work through your course
Watch each lesson, do the reflection, then take the quiz. Quizzes grade themselves instantly. Didn’t reach the goal? Review the lesson and try again — mistakes are data.
-
3
Earn your certificate
Finish every lesson and pass the quizzes to earn your certificate of completion. College students: add it to your résumé and LinkedIn.
Still have questions?
We’re happy to help.
Call 813-735-9037, email indiawhiteconsulting@gmail.com, or book a free 15-minute call.